The basics – White Sauce aka Béchamel

Winter Vegetable Pasta Casserole

Winter Vegetable Pasta Casserole

We have covered the base of most Italian sauces, soffritto. Now we can talk about one of the staples of French Cuisine, which is widely used in Italian Cuisine also, Béchamel sauce.

Many recipes of the French Cuisine are also part of the Italian Cuisine, not only do the two countries share borders, but in history there have been many occasions when the Italians influenced the French, and vice versa.

One of main differences between the French Cuisine and Italian Cuisine, is that the French wrote down the recipes into a book, and therefore claimed them and made them a “rule” . . . in Italy each family has their own version of the same sauce . . .  and no one really wrote them down.

So, back to our White Sauce, it is as easy as 1, 2, 3, and can be upgraded and flavoured in thousands of ways, it is the base of the famous cheese soufle, and many other fancy dishes. For everyday life, it is a great way to make casseroles creamy, and a wonderful way to use up left over vegetables in the refrigerator!

basic Béchamel Sauce:

  • 50 g butter
  • 50 g flour
  • 500g milk
  • salt and pepper to taste

The main thing is that you keep the proportions, if you need more, you can make it with 100g butter and flour, and 1 litre of milk, and so on . . .

I put the milk in a microwave proof container to heat up, if you don’t have a microwave you can heat it up on the stove top.

In a pot large enough to hold all of the ingredients, I heat the butter and flour together. The main idea is to melt the butter and toast the flour until it is all one paste – if you cook too much and it turns brown, it is also very good . . . just a bit more colourful  😉

When the butter and flour are bubbling and starting to become golden, add the hot milk to the pot slowly while whisking continuously to avoid the formation of lumps. Season with salt and pepper to taste.

Once you have mastered this, you can spin off any flavour, you can minced onion, or garlic, or other flavourings to your butter flour mixture, or you can add cheese or spices at  the end, or you can make it “heavier” by using whipping creme or “lighter” by using half milk and half water or stock. You can make it Gluten Free by using rice flour instead of the all purposed flour, and you can make it Vegan by using olive oil instead of butter, and soya milk instead of milk.

I love to use it when I make Pasta Casserole ( photo above), or to dress up vegetables for a special dinner ( photo below ).

Broccoli and coloured cauliflower casserole

Broccoli and coloured cauliflower casserole

Soffritto, battuto, mirepoix . . . whatever you call it. . . it is the base !

Some people call it “soffritto” ( which means fried in shallow grease), some people call it “battuto” which litterally means beaten, in Canada I’ve heard it called Mirepoix ( which is not really correct . . .  but we can talk about it in an other post).

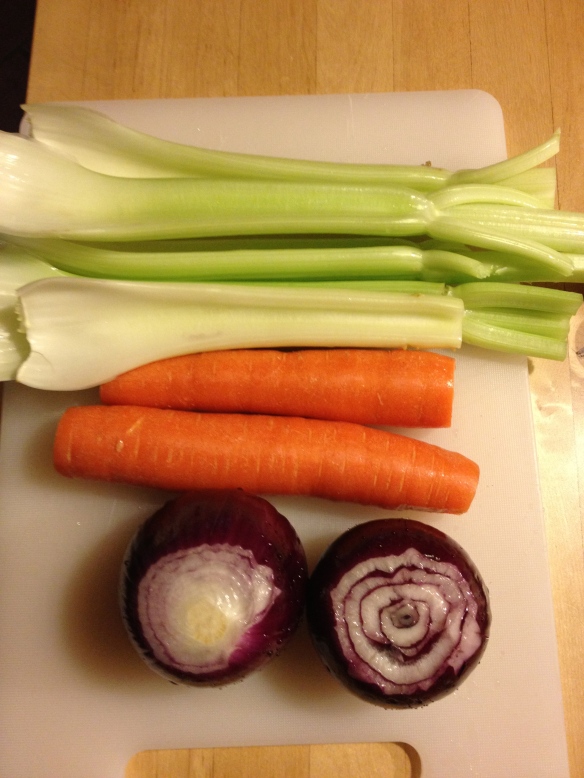
Onion carrot celery

These three ingredients, finely minced, are the base of very many recipes of the Italian Cuisine, with this mixture you can give flavour and richness even to the most simple and trivial dishes.

I can not call this a recipe, because this, as I mentioned above, is the base of many many recipes. The problem that most of us may encounter is that we don’t always have fresh carrots or celery in the refrigerator, or maybe we don’t have the time to chop them finely by hand . . . and, let’s be honest, pulling out the food processor and having one more thing to wash is always a pain!

What do I do ? It’s really simple: With my food processor I finely chop a “nice quantity” of the tree ingredients – the proportions between carrot, celery and onion are very personal . . . some people add other ingrediens to these as parcely or other herbs – I prefer to keep the flavour balanced and simple so that I can use it for as many dishes as possible.

Chopped soffritto battuto

Once everything is finely chopped, being careful that it doesn’t become liquid, I put it into small plastic bags for the freezer, I find that the ones with a zipper are the best, here in Italy you can find them at IKEA .  For a more practical use, I fill the bag about half way, then I lay it on the table and flatten it so that I let as much ari out as possible, then I freeze it flat. Once it is frozen it will be nice and hard and will take up less space, when I am preparing a sauce, or a risotto or a stew  and need some soffritto all I have to do is open the bag, break off as much as I need, and then return the bag into the freezer.

This way I always have my basic ingredients handy, there is no waste, and I only have to work once 😉

BATTUTO SOFFRITTO

Sacchetto battuto soffritto

Mussels au gratin

Mussels au gratin

For 4 people I bought one bag of fresh mussels and cleaned them . . . I like doing it myself better than having the machine do it  . . . or you can buy a bag of frozen mussels in their shell.

To clean the mussels you need to rip out the “rope” that sticks out of the shell with a certain energy. You must throw away all the mussels which are open or have a broken shell . . .  better safe than sorry! Once all the rope is removed you need to scrub the shells with a metal brush to remove all the dirt.

I poured a couple of tablespoons of olive oil in a large pan and added one or two cloves of garlic then as it was all heating I put all the mussels in the pan. I stirred just enough to have all the mussels be “touched” by the oil and then covered them. I let them cook on low flame stirring once until all the shells were opend.

When the mussels open it means they are cooked. If the mussel did not open it’s shell, it is not good and you MUST throw it away – don’t try to open it !

Once the mussels were cooked, I prepared a large baking sheet and set each of the half shells with mussel on it – discarding the empty half shell – and set it aside.

I filtered the liquid that was left in the pan and set it aside.

I then made some coarse breadcrumbs with some tuscan bread, and mixed it with chopped parsley, chopped garlic and grated parmesan. I then added some of the cooking liquid from the mussels to soften the mixture up – but not enough to make it soggy. You can use panko instead of bread crumbs, but you want to crush it a little bit as it would be too coarse.

With a teaspoon I “filled” the mussel shells in the baking sheet with the bread mixture, then drizzled some olive oil on  top and cooked it for 10 – 15 minutes in a hot oven (350F or 180C)

DELICIOUS!!

Barley “risotto” with mushrooms

Barley and mushroom "risotto"

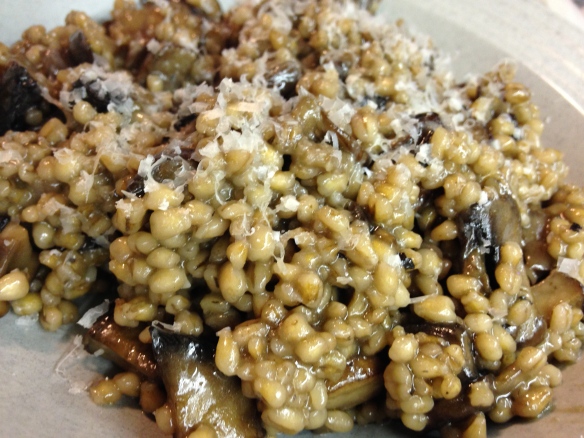
Barley and mushroom “risotto”

As we all know, “risotto” is a typical italian dish made with rice. You need to use a short grain rice that is quite starchy, like Arborio, Carnaroli, Vialone Nano . . .

Risotto is also the way the rice is cooked,  by adding the liquid to the pot of rice as it is absorbed while stirring frequently.

What I did last night is make a “risotto” using pearled barley instead of rice !!

. . .  so here are the details. ..

The main ingredients

The main ingredients

You will need button mushrooms sliced, portobello mushrooms sliced, garlic, olive oil, butter, parmesan cheese, some red wine, and stock (I used vegetable but meat is good too). . .  and some herbs . .  . I used thyme leaves

I measured 80g of barley per person and set it to the side. I got a small pot ( I was cooking just for me) of stock on one of the burners and kept it simmering – I use stock cubes for this kind of dish.

In a frying pan I added olive oil and garlic, and let it heat up just enough so that the garlic gives out some of its flavour to the oil. Then I added the portobello mushrooms and let them cook for a few minutes. When they were about ¼ cooked I added the sliced button mushrooms and let them cook, stirring often, until they were about ½ cooked.

I removed the mushrooms from the pan and set them aside in a plate. Without washing the pan I added some more olive oil and returned it to the burner. I poured the pearled barley into the pan and let it toast for a few minutes, then I put the mushrooms back into the pan and deglazed with a bit of red wine. I then started to add the stock, one ladle at a time, stiring well so that all the ingredients are well blended and that no barley is stuck to the sides. Let the barley and mushrooms cook, stirring occasionally, and when the barley has absorbed the stock, add some more. Keep adding stock, and stirring to mix ingredients until the barley is cooked ( I like it al dente . . .  ).

When the barley is cooked, taste for salt . . .  you probably will not need much because the stock gets boiled down and evaporates and becomes more tasty . . .  and add your herbs and some pepper if you like it.

Remove from heat, add a spoon of butter and grate some parmesan cheese on top – stir these in and your barley will become a bit more creamy.

Pearled barley and mushroom risotto

Pearled barley and mushroom risotto

Serve immediately and enjoy the flavour boost !!

Kale – 10 ways of preparing it

In this time of the year, in this part of the world . . . it’s Kale season !

Kale is part of the Cabbage vamily and is very rich in Vitamin A, C and Potassium


(even after cooking).

But how do we prepare it ? how do we cook it?

To clean the kale (this is black kale ) you need to remove the center spine of the leaves, it is hard even after cooking. In the picture you can see the difference between a “clean” leaf and a whole one.
Kale needs to be washed in plenty cold water and cooked in plenty boiling salted water for about 10 / 15 minutes. After it has been boiled there are many many ways to cook or serve it, here are 10 ideas:

  1. on bread with extra virgin olive oil: slightly toast a slice of tuscan bread, rub a piece of garlic on one side, cover the slice of bread with cooked kale ( and a little bit of it’s cooking water) and dress with new tuscan extra virgin olive oil, green and tangy.
  2. sauteed in a pan: drain the kale and keep one or two cups of it’s cooking water aside. Roughly chop the kale. Sautee it in a pan with olive oil and garlic. As you sautee it you can ad other flavours like: red pepper, fresh ginger, anchovies, beans, sausages, pieces of bacon . . .
  3. once it is sauteed, kale is great to dress pasta or gnocchi – just remember to always keep a cup of the pasta’s cooking water to add to the pasta as you dress it, this will make the sauce softer and it will “hug” the pasta better
  4. ribollita – see recipe
  5. in the oven with eggs: roughly chop the cooked kale and dress it with oil and salt and a clove of garlic if you like it. Arrange the kale in an oven proof dish leaving little craters for the eggs. Set a raw egg in each crater and loosen the white of the egg so that it runns through the kale leaves. Add salt and pepper on the eggs and set in a hot oven for a few minutes ( the cooking time depends on how well done you like your eggs)
  6. kale is great with stewed squid, or with shrimp – sauteed with a splash of lemon
  7. frittata – beat a couple of eggs per person, add 1 or 2 tablespoons of grated parmesan cheese, 1 or 2 tablespoons of milk, salt and pepper. Pour the mixture in a greased frying pan, add the cooked chopped kale ( if you have any leftover sauteed kale it  works great !). Let cook covered on low heat. If you are looking for more body in your frittata, add some sliced boiled potatoes . . . .
  8. Kale Chips :Preheat oven to 250°F. Toss kale with olive oil in large bowl. Sprinkle with salt and pepper. Arrange leaves in single layer on baking sheet. Bake until crisp, about 30 minutes for flat leaves and up to 33 minutes for wrinkled leaves. Transfer leaves to rack to cool.
  9. Cream of Kale with spelt: Sautee the roughly chopped kale with olive oil and garlic. Add 1 cup of vegetable broth and let cook untill kale is very dender. Puree the kale (add some broth if necessary) and return to skillet, add cooked farro and correct the seasoning. Serve with a splash of fresh new olive oil.
  10. simply boiled and dressed with olive oil, salt and a few drops of fresh lemon juice!

Kale will keep for a few days in the refrigerator and can be frozen after it has been par-boiled . . .  enjoy it !!

Pizza di Patate … Potato Gateau

Potato Gateau

Potato Gateau

Pizza di Patate is one of my family’s most loved recipes. My Great Grandmother used to make it and then my Grandmother, then my Mother and my Father . . .  they all made / make it . . .and so do I !! 🙂

Here is the recipe for 4 people:

1.5 kg of potatoes ( I use the yellow fleshed or the russet), 200 ml of milk, 2 eggs, 100 g ( + or – ) of grated parmesan cheese, mozzarella and ham, salt and nutmeg

Boiled potatoes

Boiled potatoes

Boil the potatoes until they are nice and tender, peel them and puree them with a ricer or in your kitchen robot ( or both). Add warm milk, egg and ⅔ of the parmesan cheese  salt and nutmeg to taste and mix well.

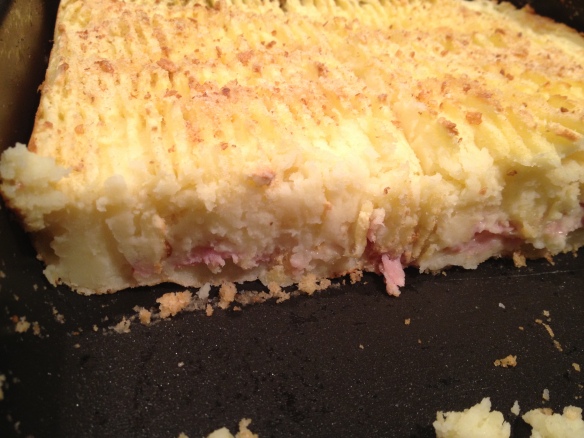
Transfer ½ of the potato mix In a greased pyrex or oven proof baking dish and spread it evenly throughout the dish. Now layer the ham and the cheese ( it is really up to you how much you add to it . . .  I like it 2 or 3 slice of ham thick and a nice bit of cheese). Then cover with the remaining potato mixture and spread out evenly.

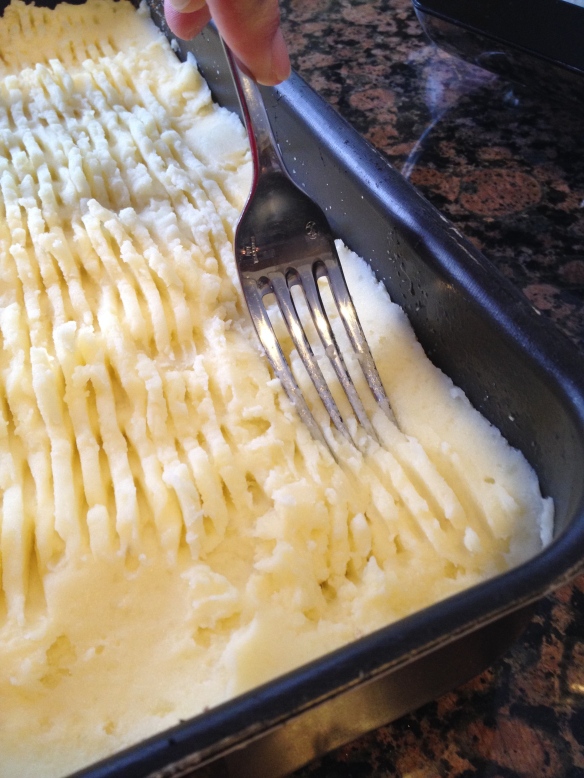
Scoring the top layer with my fork

Scoring the top layer with my fork

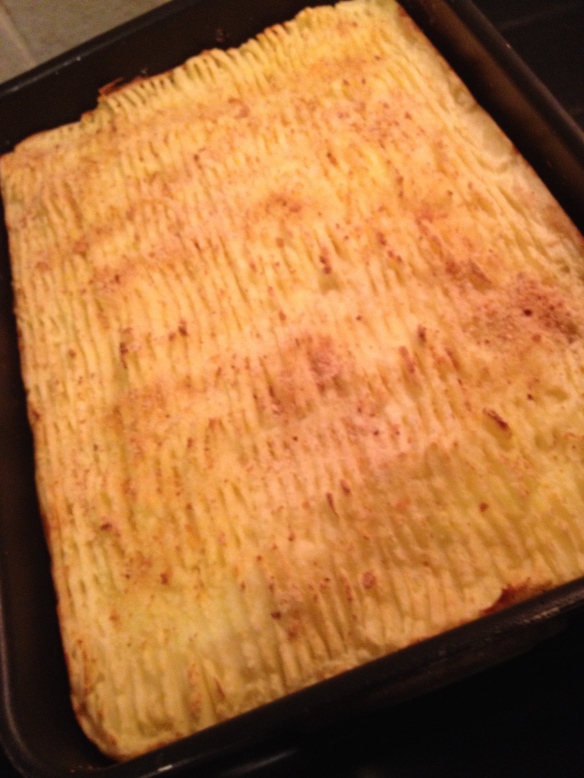
Score the top of the potato layer with the back of a fork so that you make grooves over the surface. Sprinkle the remaining parmesan cheese and some breadcrumbs ( or cornmeal if making it gluten free) then add a little bit of olive oil.

Bake in a preheated oven ( 200* C or 375* F) for 30 to 40 minutes or until it is heated through and crunchy on top.

Potato Gateau

Potato Gateau

This is delicious hot, warm or cold . . . it is great for picnics, potlucks and school lunches . . .  we adore it !!

Home made Pesto

Basil

Basil

Temperatures are nice and warm, garden centers are as busy as an anthill, for me it is time to stock up on the herbs !

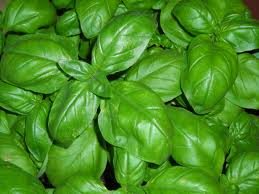
I like to make as much of the food we eat myself, and pesto is one of the easiest and most versatile sauces that can be made . . . .  needless to say, it is also extremely delicious.

Here is my recipe, which comes from the “Consorzio del Pesto Genovese” which is the consortium of Genoese pesto. Unfortunately mine can not be called “Pesto alla Genovese” because I will not find the same variety of basil that they use in Liguria ( the region in Italy where pesto is made) which is called “Ocimum Basilicum”

Pesto

Pesto

Ingredients for 4 people:

– 50 grams of fresh basil – 1/2 cup extra virgin olive oil – 6 tablespoons grated parmesan cheese – 4 tablespoons of Pecorino cheese – 2 cloves of garlic (the rule requires 1 clove every 30 leaves of basil) – 1 tablespoon of pine nuts – a pinch of salt.

Old fashion way:

  • Wash the basil leaves and let them dry on a tea towel.
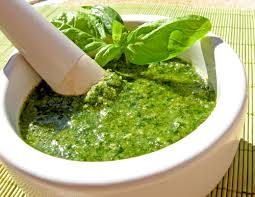
  • In a marble mortar with a wooden pestle crush the garlic with a pinch of salt.
  • When the garlic has turned into a creme add the basil leaves, a few at a time, and gently crush them with a round movement so that you can extract all the essential oils.
  • When the mixture becomes bright green add a handfull of pine nuts and work them into the basil to make a paste.
  • Now you can add the two cheeses and when everything is all combined you add the olive oil, piano piano = little by little untill you reach the desired consistency.

Modern way:

  • Wash the basil leaves and gently dry them with a tea towel, insert all ingredients with 1/2 of the oil in a food processor and pulse untill the pesto comes together, or in a tall container and blend with an immersion blender, then add the remaining olive oil untill you reach the desired consistency.

Tips:

– You can make large quantities of pesto and freezer it, I like to put it in muffin tins, lined with paper liners, this way I have the right quantity whenever I need it.

– To avoid it from oxidizing and turning dark green add a little bit of sparkling mineral water


Vanilla Lemonade

Vanilla Lemonade

The warm wather calls for a nice chilled lemonade . . .  why not make it with vanilla flavouring ?!

Ingredients:

3 Lemons

1/2 cup sugar  ( more if needed)

1/2 teaspoon vanilla extract

4 cups water

Procedure:

Squeeze the lemons.  Heat up 2 cups of water and stir in the sugar and vanilla untill melted. Add the lemon juice and the last 2 cups of water.

Taste it . . .  if you needed add more sugar or water . . .

Refrigerate or add some ice . . . .

Here is your vanilla lemonade !!


Mozzarella in carrozza ( Italian version of grilled cheese sandwich)

Mozzarella in Carrozza

Mozzarella in Carrozza

How often does it happen that you buy bread and don’t eat it all ?

If there is one thing that I really dislike, that is wasting food, specially bread ! it  really seems like adding insult to injury !

So what to do with that stale bread ? Sure, you can make Ribollita if it is tuscan bread, or you can let it dry in the oven and make real breadcrumbs out of it, not like the ones you buy that are so fine they look like flour !!

Sunday night I had some mozzarella in the refrigerator which was getting close to the expiry date so I thought to use up the bread and make ” Mozzarella in Carrozza ” which literally means Mozzarella in a Carriage !!

ingr. mozzarella in carrozza

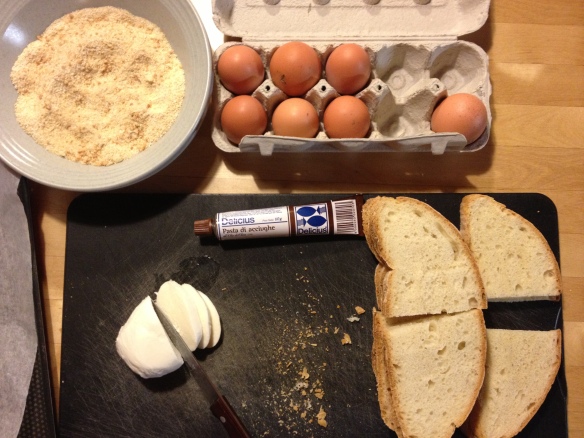
These are the ingrediente: Day old ( or more) bread, mozzarella, anchovy paste ( if you like it), egg beat with a pinch of salt, breadcrumbs, and a bit of Olive Oil

pane toscano

I cut some slices of bread, not too thick or too thin, I didn’t make it fancy by cutting the crust off and by shaping the slices into a regular shape . . .  but if you have the time and will you will surely have a prettyer result !!

pane e mozzarella

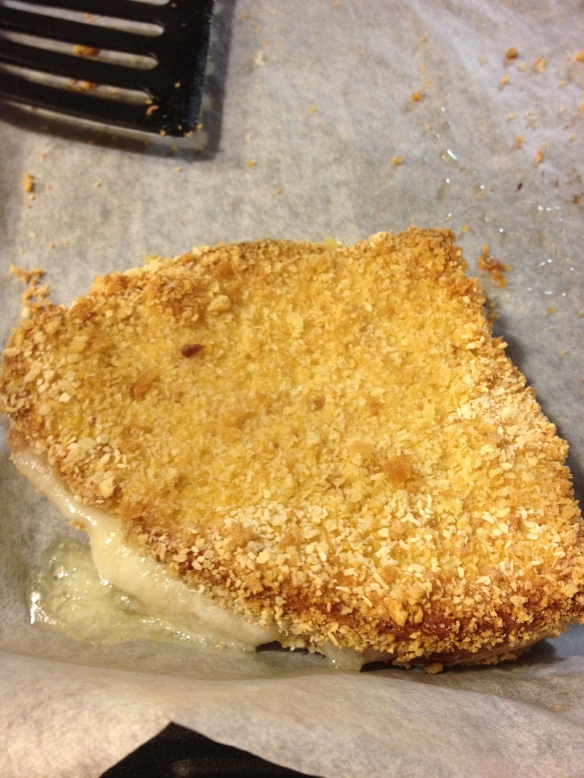
On one slice of bread I put a couple of slices of mozzarella, on the adult ones I spread a little bit of anchovy paste ( the kids don’t like it !), then I covered it with the other slice of bread and dipped it in the egg mixture making sure that it was wet on all sides including the edges. I then covered it with the breadcrumgs – including the edges.

Mozzarella in carrozza 3

The sandwiches were then put on a cookie sheet covered with oven paper and after drizling some olive oil on them I cooked them in a hot oven ( 200° C) for about 15 minutes ( or untill the mozzarella is melted and the breadcrumbs are crunchy)

. . .Useless to say there were no left overs  . . . actually, I had a hard time taking the last pictures . .

To make the Mozzarella in Carrozza even more tasty, next time I think I will butter the bread on the outside, and I will add some grated parmesan to the  breadcrumbs . . . this way it will be even more crunchy !!

mozzarella in carrozza 2

Quickest mashed potatoes

Potato

Here is the secret to “last minute” mashed potatoes !

  1. Fill a large pot with water and put it on the stove to heat up
  2. Peel the potatoes and chop them into 1/2 inch cubesPatate
  3. when you will have finished peeling and chopping the water will be boiling
  4. put chopped potatoes into the boiling water and add a bit of salt
  5. after a few minutes pierce the potatoes to see if they are tender, drain them and mash them
  6. add warm milk and butter

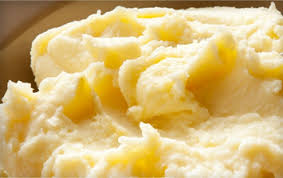
Mashed potatoes are READY !!

Mashed Potatoes